Few weeks back, my team at work wanted to explore a Podcast Dashboard and so we decided to implement it in Blazor WebAssembly (which was in preview then but is now officially released as part of Build 2020). One of the requirements for this site was to implement a countdown timer using websockets for which we ended up using SignalR.
NOTE: This is the first post in this series which explains how to get started with Blazor and customize its web layout.
Getting started with Blazor is very easy. The template is very similar to the other SPA templates available in Visual Studio and with just few clicks, you can get decent functionality out of the box.
Note: You’ll need .NET Core SDK (3.1.3 or later) and Visual Studio 2019 (16.6 or later) to get started. The previous link gets into more detail if you are interested.
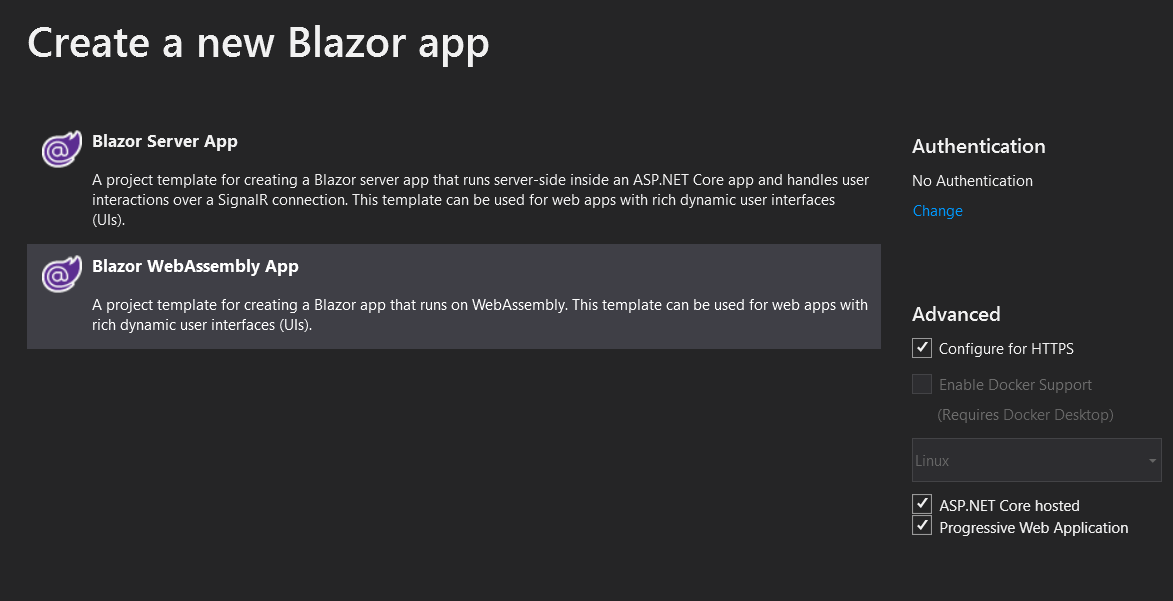
When creating a new project, you can select from the available Blazor App template as shown here:

Blazor provides 2 templates out of the box, server-side, which runs inside ASP.NET core app or client-side, which directly runs inside the browser using WebAssembly. You can read about the different hosting models along with their benefits & downsides here.
The Blazor WebAssembly solution template looks like the following:
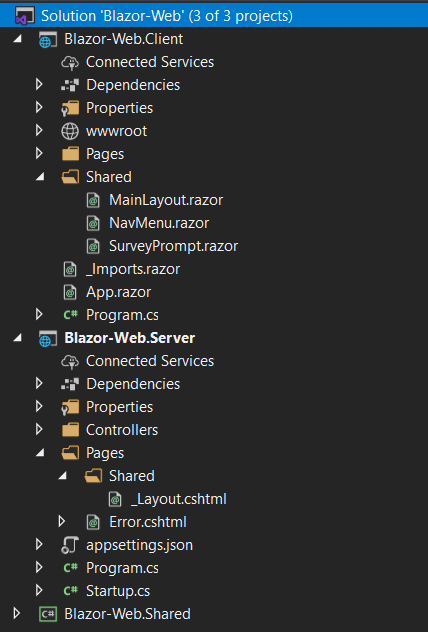
The Blazor-Web.Server is the startup project which sets up the standard ASP.Net core host and the WebAssembly host. The Blazor-Web.Client project contains several .razor components (combination of C# & HTML markup) of which App.razor is the root component and references other components such as the Router & MainLayout. The Blazor-Web.Shared project as the name indicates, contains common files. You can read more about components and how they work here
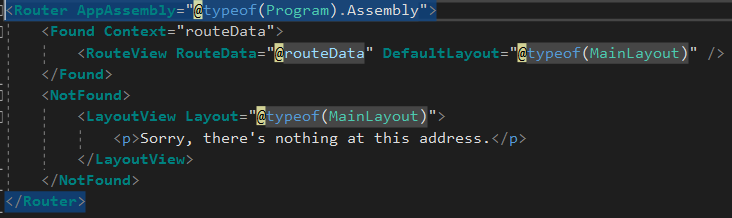
Following is the output of App.razor component:
Just running the project as is brings up the following layout similar to other SPA templates.

Now the first thing, I wanted to do was to change the layout to remove the side bar and instead have a top navigation bar. I found a Stackoverflow discussion explaining how to do it, which I used as a reference.
The first step I did was to modify the app.css (This used to be site.css) file under wwwroot in the client project and remove all references to the sidebar class elements which are shown below:
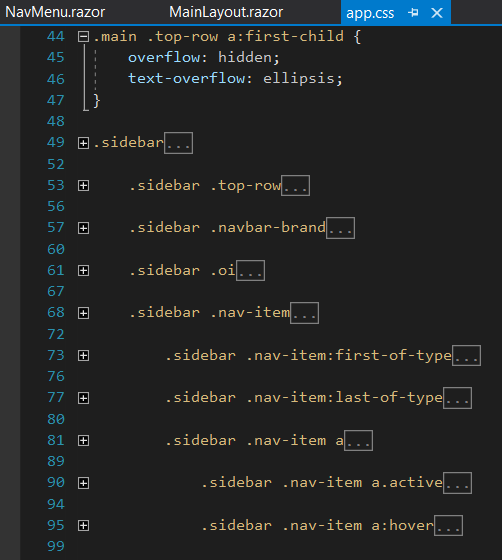
In addition, I also got rid of the several main class elements and only left the default one as shown below (I left this one as it is being referenced in the MainLayout component):

OK, next step was to change MainLayout.razor component HTML markup to remove the div element where Navbar was displayed and conslidate as shown below:

Next, I modified Navmenu.razor file to include the following:
<nav class="navbar navbar-expand-sm navbar-toggleable-sm navbar-light bg-white border-bottom box-shadow mb-3">
    <a class="navbar-brand" href="">Blazor-Web</a>
    <button class="navbar-toggler" type="button" @onclick="ToggleNavMenu">
        <span class="navbar-toggler-icon"></span>
    </button>
    <div class="@NavMenuCssClass" @onclick="ToggleNavMenu">
        <ul class="navbar-nav flex-grow-1">
            <li class="nav-item">
                <NavLink class="nav-link text-dark" href="" Match="NavLinkMatch.All">
                    <span class="oi oi-home" aria-hidden="true"></span> Home
                </NavLink>
            </li>
            <li class="nav-item">
                <NavLink class="nav-link text-dark" href="counter">
                    <span class="oi oi-plus" aria-hidden="true"></span> Counter
                </NavLink>
            </li>
            <li class="nav-item">
                <NavLink class="nav-link text-dark" href="fetchdata">
                    <span class="oi oi-list-rich" aria-hidden="true"></span> Fetch data
                </NavLink>
            </li>
        </ul>
    </div>
</nav>


@code {
    bool collapseNavMenu = true;

    string baseMenuClass = "navbar-collapse d-sm-inline-flex flex-sm-row-reverse";

    string NavMenuCssClass => baseMenuClass + (collapseNavMenu ? " collapse" : "");

    void ToggleNavMenu()
    {
        collapseNavMenu = !collapseNavMenu;
    }
}
Note: The above is similar to what the stackoverflow link states, only difference being… I am not using a container styled div element to wrap navbar elements.
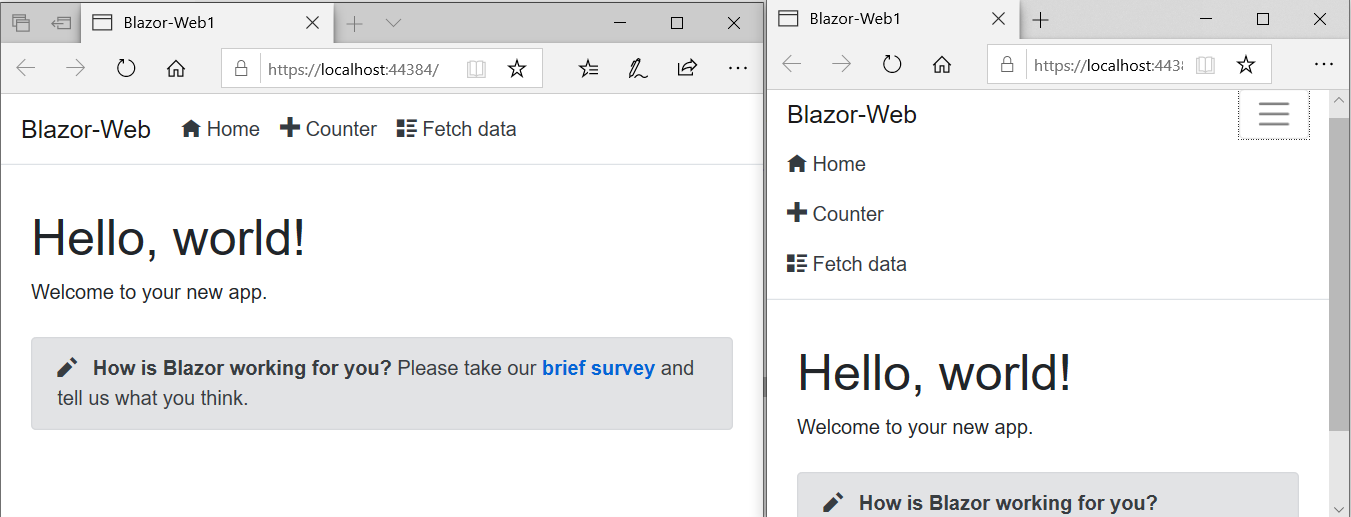
That was it!, While it did take a few trial and error attempts to get this working but once the changes were in place, you can see the navigation bar displayed on the top along with the collapse menu as shown here:
In, the next post we will explore how to integrate SignalR for the timer functionality.